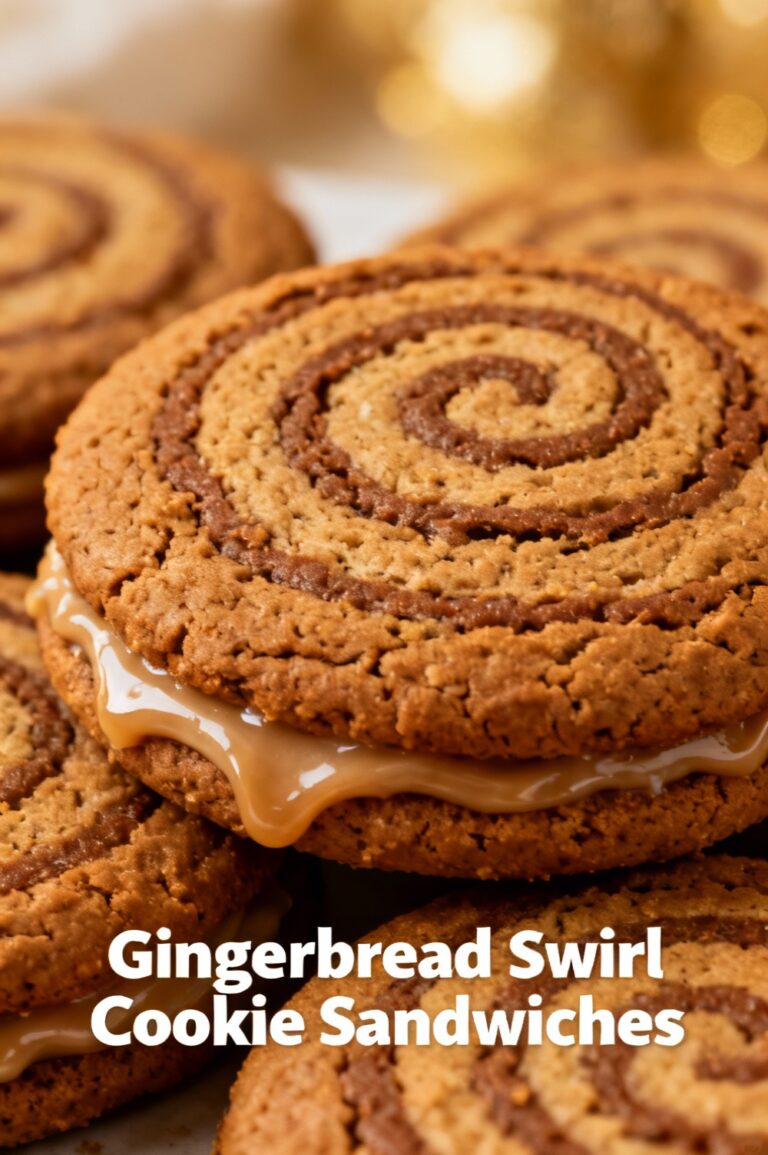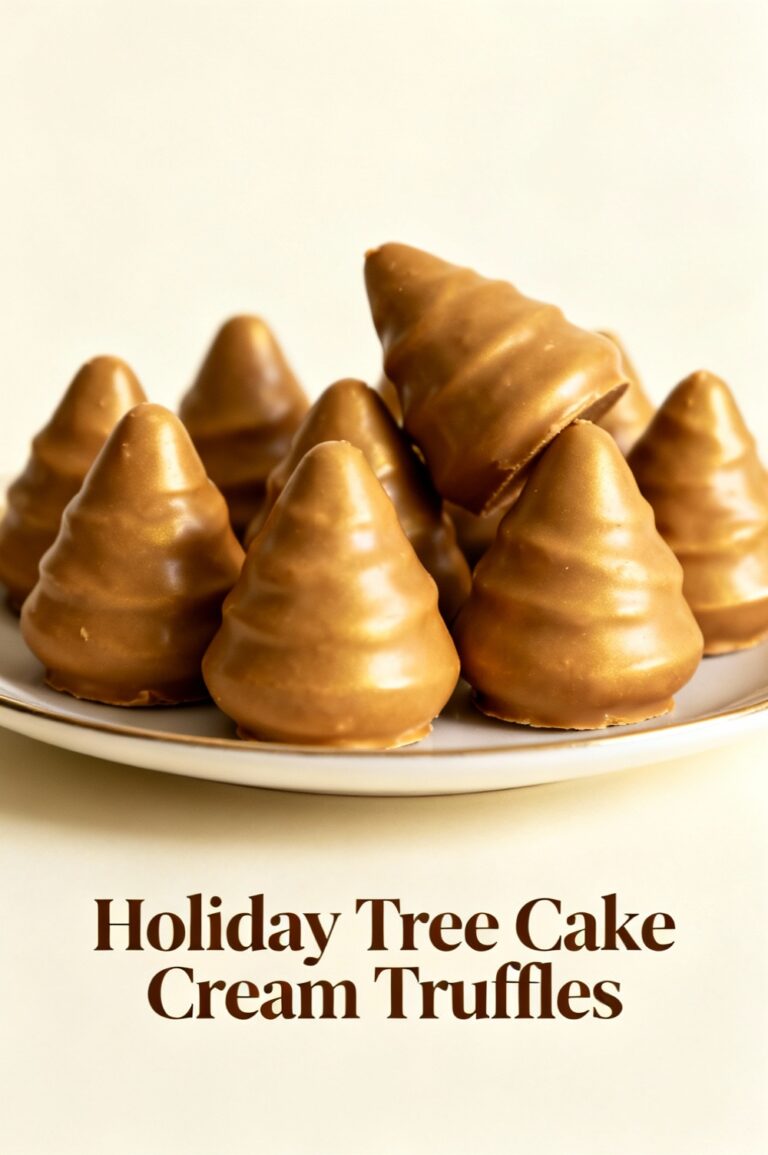
Festive Tree Cake Chocolate Pops
Introduction
Did you know that search interest for cake pops typically doubles during the December holiday season, as home bakers look for festive, giftable, and shareable desserts that are quick to make and visually impressive? If you’ve ever dismissed cake pops as fussy or time-consuming, this Festive Tree Cake Chocolate Pops recipe challenges that belief: it transforms leftover cake into elegant, holiday-themed pops in under two hours while delivering big seasonal flavor and Insta-ready presentation.
Ingredients List
- 2 cups crumbled vanilla or chocolate cake (about one 9-inch cake or 6–8 store-bought cupcakes). Substitution: use gluten-free cake mix or almond flour cake for GF options.
- 8 oz (225 g) cream cheese or frosting of your choice (vanilla buttercream, marshmallow fluff, or a vegan frosting). Sensory note: use cream cheese for tangy balance with chocolate, buttercream for a richer mouthfeel.
- 12 oz (340 g) semisweet chocolate or chocolate melting wafers for coating. Substitution: 70% dark chocolate for less sugar, or white chocolate for a more festive look.
- 1 tbsp coconut oil or vegetable shortening (optional; thins chocolate for smoother coating).
- 20–24 lollipop sticks (or skewers trimmed to cake-pop length).
- Green candy melts or colored white chocolate for the tree coating; red/white sprinkles, mini M&Ms, edible glitter, or star sprinkles for decoration.
- Optional: crushed peppermint, finely chopped nuts, or toasted coconut for texture; flavor add-ins like 1 tsp vanilla extract, 1 tsp almond extract, or 1–2 tbsp cocoa powder for extra depth.
- For stability (optional): 1/2 cup melted chocolate to “glue” tiers if stacking.
Timing
Preparation time: 25–40 minutes (crumbling, mixing, shaping). Chilling time: 30–45 minutes (firming the pops). Decorating & coating time: 20–30 minutes. Total time: approximately 75–115 minutes depending on chilling efficiency and decorations — which is often 30–50% faster than multi-component holiday desserts that require layering, baking, and cooling separately. If using pre-baked cake, you’ll be at the lower end of the range.
Step 1 — Prepare your cake base
Crumble cooled cake into a large mixing bowl until it resembles coarse breadcrumbs. Tip: refrigerate the cake for 30 minutes before crumbling to make uniform crumbs and prevent the mixture from becoming gummy. Personalization: reserve a few crumbs of contrasting color (e.g., chocolate crumbs in a vanilla base) to sprinkle for a rustic finish.
Step 2 — Bind into a moldable dough
Add the cream cheese or frosting a little at a time and mix with a spoon or paddle attachment until the texture is moist and holds together when pressed. Aim for a play-dough consistency — not wet, not dry. Pro tip: if the mixture is too sticky, chill 10–15 minutes; if too dry, add 1–2 teaspoons of milk or extra frosting. This step controls the structural integrity of the tree shape.
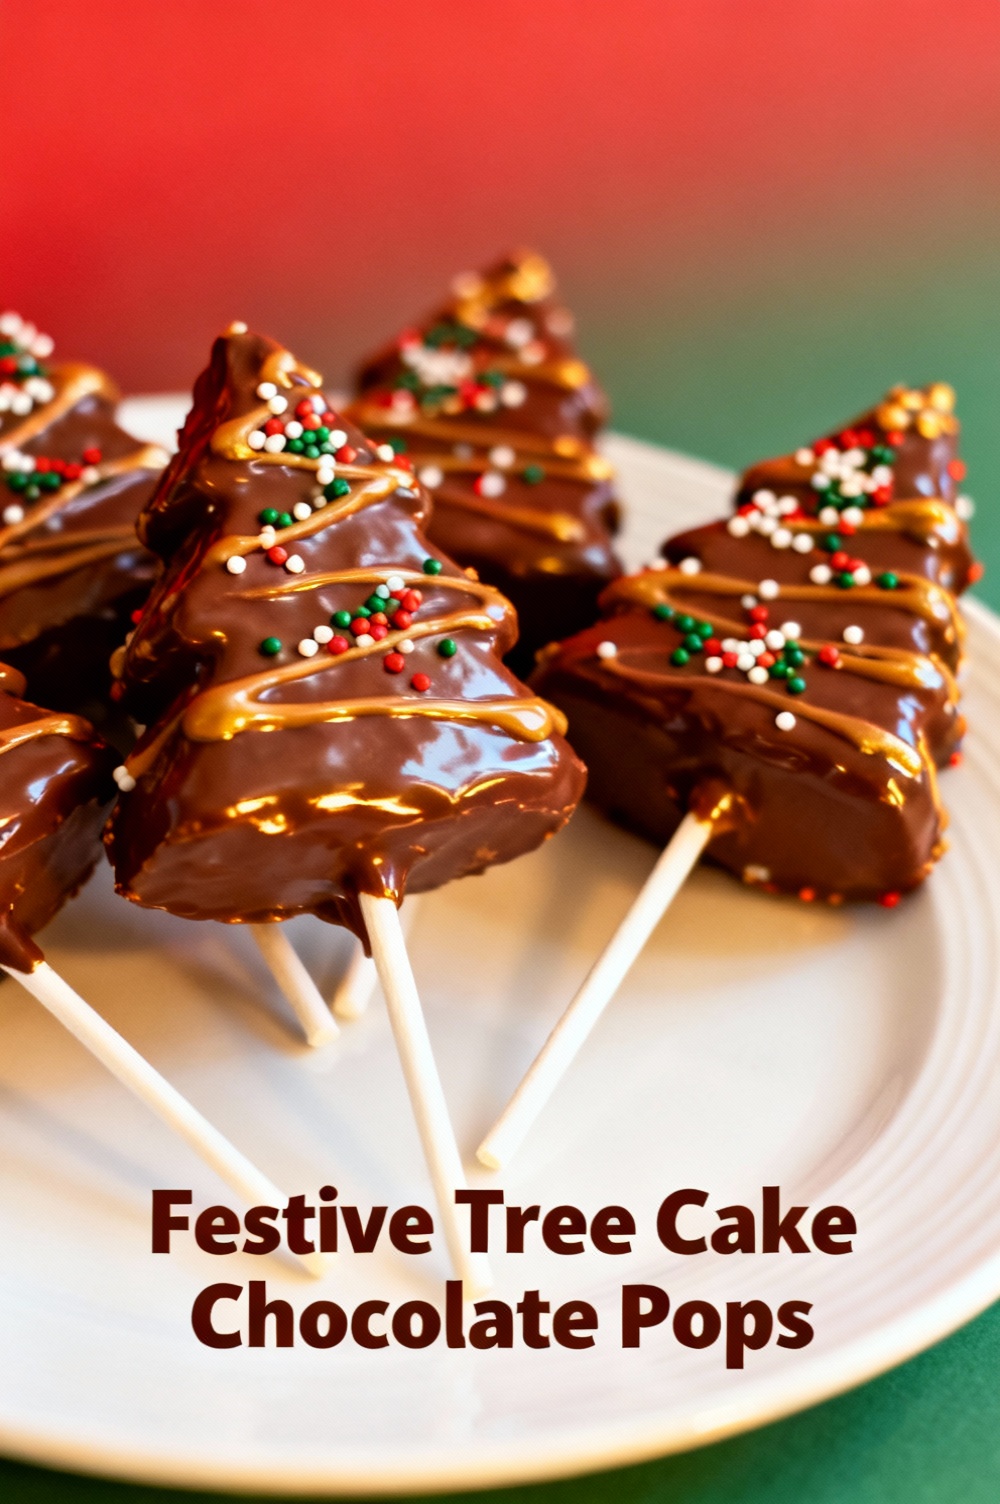
Step 3 — Shape into festive tree forms
Form the cake mixture into cone-like tree shapes or stack three graduated balls on each lollipop stick (large ball at the bottom, medium in the middle, small at the top) to create a tiered tree. Press gently to compact and smooth seams. Tip: use slightly damp hands or a small spoon to shape cleanly. For uniformity, use an ice-cream scoop or cookie scoop for the balls.
Step 4 — Chill for stability
Place shaped pops on a parchment-lined tray and chill in the freezer for 10–15 minutes or the fridge for 30–45 minutes until firm. Data-driven tip: chilling reduces cracking when coating — manufacturers of confectionery recommend a firm core temperature during enrobing for best results.
Step 5 — Prepare the chocolate coating
Melt your chocolate or candy melts in 20–30 second bursts in the microwave, stirring in between, or use a double boiler. Stir in 1 tbsp coconut oil for a glossy finish and smoother dip if needed. Keep the coating at a warm, tempered-feel consistency to prevent thick clumps; if it’s too thin, small drips will ruin your tree shape; too thick and you’ll get uneven coverage.
Step 6 — Dip and decorate like a pro
Dip each chilled pop straight into the coating, allowing excess to drip off; for the stacked-tree method, dip the bottom half first and then the top to keep seams hidden. Immediately drizzle with colored melts, apply sprinkles, or press on mini candies while the chocolate is wet. Tip: use a fork or dipping tool to rotate and tap lightly to settle the coating. For a sparkling finish, dust edible glitter or powdered sugar “snow” after the coating sets.
Step 7 — Add the finishing touches
If desired, attach a small star candy to the tree top with a dab of melted chocolate. For more depth, pipe a few lines of contrasting chocolate to mimic garland. Let the pops set completely on a cooling rack or parchment — about 15–30 minutes at room temperature, or 10 minutes in the fridge.
Nutritional Information
Approximate nutrition per pop (based on 24 pops, using standard cake, cream cheese binder, and semisweet chocolate coating): 140–180 kcal; total fat 7–10 g; saturated fat 4–6 g; carbohydrates 15–20 g; added sugar 10–14 g; protein 1–2 g; fiber 0.5–1 g. Note: nutritional values vary with cake type, binder, and chocolate choice. Swapping dark chocolate for semisweet reduces sugar by ~20–30% and increases antioxidant content slightly; using reduced-fat frosting can lower calories by about 10–15% per pop.
Healthier Alternatives for the Recipe
- Swap refined sugar: use dark chocolate (70%+) and reduce added sprinkles; sweeten the cake base with applesauce or mashed banana for natural sweetness.
- Lower fat: replace cream cheese with Greek yogurt–based frosting (drain excess whey first) or use light cream cheese.
- Gluten-free/low-carb: use almond flour cake or a keto cake base and coat with sugar-free chocolate melts.
- Vegan: use dairy-free cream cheese/frosting, vegan cake, and plant-based melting wafers. Add flavors with citrus zest, cinnamon, or a dash of espresso to deepen taste without extra sugar.
- Add fiber and protein: fold in finely chopped nuts or seeds into the cake mixture or use protein-enhanced frosting to boost satiation.
Serving Suggestions
Serve the tree pops upright in a decorated styrofoam base covered with edible glitter or shredded coconut “snow.” Arrange them on a tiered dessert stand or place each pop in miniature cupcake liners for individual servings. Pairings: hot cocoa, peppermint mocha, or a chilled dessert wine like Moscato work beautifully. For parties, make a “decorate-your-own” station with extra sprinkles and toppings to engage guests and let kids personalize their pops.
Common Mistakes to Avoid
- Overmoistening the mixture: too much binder makes pops fall apart or smear; aim for a compact, tacky texture.
- Skipping chilling: not chilling increases breakage during dipping — always firm up shapes before coating.
- Using untempered chocolate at the wrong temperature: too cool causes thick, dull coating; too hot will melt the cake interior. Keep coatings between warm and comfortably pourable.
- Overdecorating while wet: heavy decorations can pull the coating. Use lighter sprinkles or press larger items gently.
- Not testing the stick adhesion: always dip the stick base into chocolate and let it set in the cake for stability, especially if shipping or gifting.
Storing Tips for the Recipe
Store finished pops upright in an airtight container layered with parchment to prevent sticking. Room temperature: up to 2 days in a cool, dry place if using stable coatings; refrigeration: 5–7 days (covers help prevent condensation); freezing: wrap individually in plastic and freeze up to 2 months — thaw in the refrigerator to avoid sweat. For best texture, bring to room temperature 20–30 minutes before serving.
Conclusion
These Festive Tree Cake Chocolate Pops turn simple cake into a show-stopping, giftable holiday treat that’s customizable, quick, and fun to make with friends or family. With straightforward shaping, a reliable chilling-and-dip routine, and simple decorating tricks, you’ll produce bakery-worthy pops that taste as delightful as they look. Try the recipe, tag your photos on social media, and share any tweaks — your feedback helps refine crowd favorites and inspires new seasonal variations.
FAQs
Q: Can I make these ahead of time for a party?
A: Yes — make them up to 5 days ahead and refrigerate in an airtight container, or freeze up to 2 months and thaw in the fridge before serving.
Q: Will the chocolate crack if I freeze the cake pops?
A: Rapid temperature changes can lead to fine cracks. To minimize cracking, cool slowly in the refrigerator before moving to the freezer and wrap tightly.
Q: What’s the best chocolate for coating in warm climates?
A: Use chocolate with a higher cocoa butter content or candy melts formulated for stability; adding a small amount of vegetable shortening can improve heat resistance and sheen.
Q: Can I make gluten-free or vegan tree pops?
A: Absolutely — use GF cake or almond-based cake and vegan frosting or cream cheese alternatives. Use vegan chocolate melts for coating.
Q: How do I prevent the cake pop from falling off the stick?
A: Dip the stick into melted chocolate before inserting it into the shaped cake, and chill to set. Avoid inserting into a very soft mixture; ensure the core is firm from chilling.
Q: How many pops does this recipe make?
A: Yield is roughly 20–24 pops depending on size; reduce or increase ingredients proportionally to make more or fewer.
Q: Any tips for decorating like a pro?
A: Work in layers — coat, set, then add contrasting drizzles or tiny candies. Use piping bags or squeeze bottles for controlled lines and place larger decorations while the coating is still tacky.
If you’d like, I can provide a printable recipe card, a shopping checklist formatted for your phone, or a step-by-step photo guide to embed in your WordPress post for better engagement and shareability.
Festive Tree Cake Chocolate Pops
Cute chocolate cake pops shaped and decorated like Christmas trees — perfect for parties and gifting.
Ingredients
- 1 (15.25 oz) box chocolate cake mix (plus eggs, oil and water called for on box) — or 1 batch chocolate cake (about 9×13″)
- 3 large eggs (if using boxed mix)
- 1/2 cup vegetable oil (if using boxed mix)
- 1 cup water (if using boxed mix)
- 1 cup (about 240 g) chocolate frosting
- 12 oz (340 g) green candy melts or white chocolate + green gel food coloring
- 2–3 tbsp coconut oil or vegetable oil (to thin melts)
- 6 oz (170 g) milk or dark chocolate, for drizzle (optional)
- 20–24 lollipop sticks
- Yellow star sprinkles or small candy stars (for tree tops)
- Assorted sprinkles, nonpareils, mini M&Ms or edible pearls (for ornaments)
- About 1 cup crushed pretzels or small pretzel sticks (for trunks), or use chocolate-dipped mini pretzels
- Parchment paper or a styrofoam block to set pops
- Optional: edible glitter or gold pearls for extra sparkle
Instructions
- Preheat oven and bake cake: Prepare and bake the chocolate cake according to box directions (or your favorite recipe) in a 9×13″ pan. Allow to cool completely (about 30–45 minutes).
- Crumble the cake: Using your hands or a food processor, crumble the cooled cake into a large bowl until fine crumbs form.
- Make cake-pop mixture: Add 1 cup of chocolate frosting to the crumbs and mix with a spatula until the mixture holds together when pressed. Add more frosting a tablespoon at a time if needed.
- Shape trees: Take about 2 tablespoons of mixture and form into a cone/tree shape (slightly tapered). For a layered look, you can form three sizes and gently stack, but a single cone works fine. Repeat to make 20–24 pops.
- Chill to firm: Place shaped pops on a parchment-lined tray and freeze for 15–20 minutes so they firm up (this prevents them from falling apart when dipping).
- Prepare sticks: Warm a small amount of the green candy melt (or used dipped chocolate) and dip the tip of a lollipop stick about 1/2″ into it. Insert stick about halfway into each chilled cake tree. Return to the freezer for 5–10 minutes to set.
- Melt coating: Melt the remaining green candy melts with 1–2 tbsp coconut oil in 20–30 second intervals in the microwave, stirring until smooth. If using white chocolate, color with gel food coloring to a bright green.
- Dip the pops: Holding the stick, dip each tree into the melted green coating, allowing excess to drip off. Place on parchment or insert into a styrofoam block to set upright.
- Decorate: Immediately add sprinkles, mini M&Ms, pearls and place a yellow star on the top before the coating sets. Use melted milk/dark chocolate drizzled in a zig-zag for garlands if desired. For trunks, press a small pretzel piece or a short pretzel stick into the base while coating is still tacky.
- Set and serve: Let pops fully set at room temperature or refrigerate briefly (5–10 minutes). Store in an airtight container in the fridge up to 3 days, or at cool room temperature for 1 day.
- Tips: If coating becomes too thick, microwave 10–15 seconds and stir, or thin with a little coconut oil. Handle pops gently and work in batches so coating stays fluid.
Nutrition Information
- Calories: 240 kcal
- Cholesterol: 30 mg
- Sodium: 120 mg
- Carbohydrates: 28 g
- Fiber: 1 g
- Sugar: 18 g
- Protein: 2 g