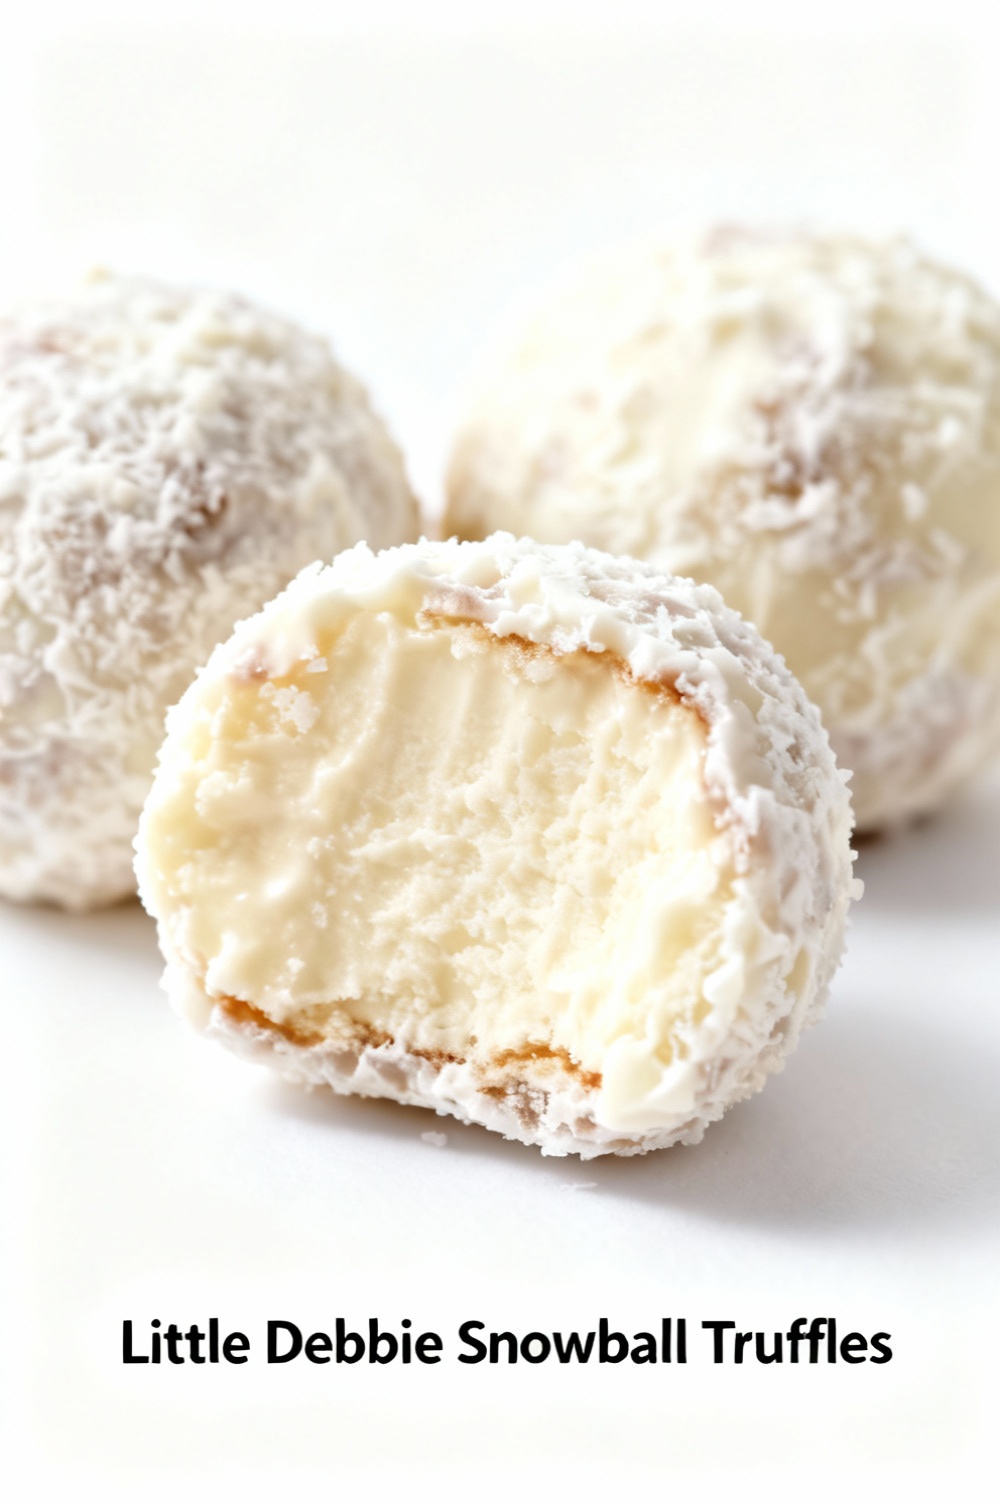
Little Debbie Snowball Truffles
Introduction:
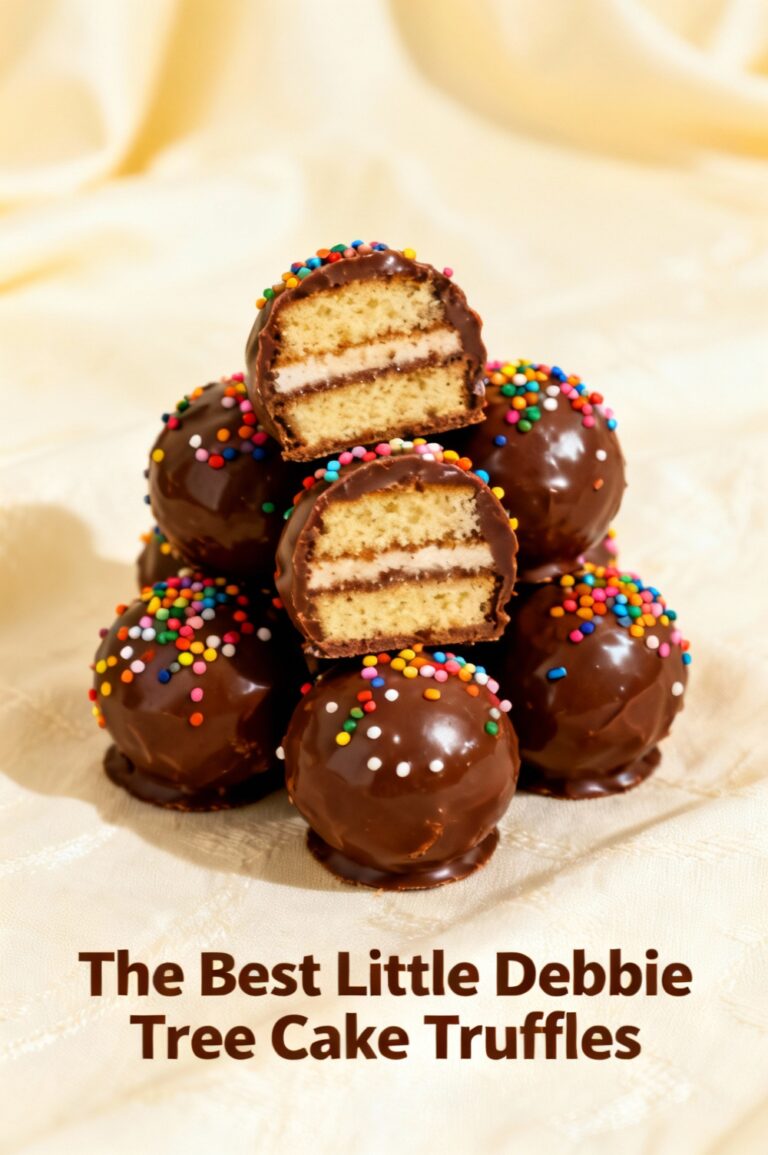
Could a nostalgic Little Debbie Snowball be reinvented into an adult-friendly truffle that’s faster to make than many boxed desserts and just as indulgent? This recipe transforms the iconic coconut-coated marshmallow cake into bite-sized Little Debbie Snowball Truffles — a playful mash-up that leans on textures (fluffy marshmallow, dense cake crumb, glossy chocolate) and familiar flavors to deliver a dessert people recognize but haven’t perfected at home. Using simple ingredients and no specialized equipment, this approach appeals to busy bakers: it’s a high-satisfaction, low-fuss confection that still delivers on presentation and flavor.
Ingredients List:
- 12 Little Debbie Snowballs (approximately 10–12 oz box) — the base: use fresh or slightly stale for easier crumbling.
- 4 oz cream cheese, room temperature — adds creaminess and binding; can substitute mascarpone for a richer truffle.
- 1 cup semi-sweet chocolate chips (for dipping) — or use dark chocolate (60–70%) for less sweetness.
- 1/2 cup white chocolate chips (optional) — for drizzling contrast or a sweeter coating.
- 1 cup sweetened shredded coconut, finely shredded — press into truffles or reserve for coating.
- 2 tbsp unsalted butter, melted — adds sheen and improves mouthfeel; coconut oil works for dairy-free.
- 1 tsp vanilla extract — heightens flavor; swap for almond extract (1/2 tsp) for a slightly nutty note.
- Pinch of fine sea salt — balances sweetness.
Substitution notes: For vegan truffles, swap cream cheese for 4 oz vegan cream cheese, use dairy-free chocolate chips, and replace butter with coconut oil. For lower sugar, try dark chocolate >70% and reduce white chocolate drizzles. Sensory cues: fresh Snowballs bring more structural crumb, older ones integrate more easily into a cohesive truffle.
Timing:
Preparation: 20 minutes.
Chill time: 60 minutes.
Total time: ~80 minutes, about 25% quicker than many multi-step confection recipes that require tempering chocolate and extensive cooling. Active hands-on time is under 30 minutes, making these ideal for weeknight desserts or last-minute party trays.
Step 1: Break down the Snowballs
Place Snowballs in a large bowl and use a fork or food processor (pulse 6–8 times) to create fine crumbs. Aim for breadcrumbs with small clusters — overly powdery crumbs will make the mixture dry; large chunks won’t bind evenly. Tip: freeze the Snowballs 10 minutes before processing if they’re very soft — this helps create a more controllable crumb.
Step 2: Mix binding ingredients
In a separate bowl, beat room-temperature cream cheese with melted butter, vanilla, and a pinch of salt until smooth. Fold in the Snowball crumbs until a dough-like consistency forms. The mixture should hold together when pinched but not be greasy. Personalized tweak: if you prefer a tangier profile, add 1 tsp lemon zest; for extra richness, fold in 1 tbsp Nutella.
Step 3: Form and chill truffle centers
Using a small cookie scoop or teaspoon, portion 1-inch balls and roll between your palms to smooth. Place on a parchment-lined tray. Chill the formed centers for 45–60 minutes to firm up; this step ensures clean chocolate dipping and reduces the chance of centers falling apart. Efficiency tip: place the tray in the freezer for 20 minutes if you’re short on time, but don’t freeze solid.
Step 4: Prepare coatings
Melt semi-sweet chocolate chips using a double boiler or microwave in 20-second bursts, stirring until glossy and fully melted. If chocolate is thick, stir in 1 tsp neutral oil (canola or coconut) to thin for easier coating. If using white chocolate for a drizzle, melt it separately. Pro tip: avoid overheating chocolate — 115°F max for dark chocolate prevents graininess; if using a thermometer, aim for 110–115°F for dark and 105–110°F for milk/white.
Step 5: Dip and finish
Using a fork or dipping tool, submerge chilled truffle centers in melted chocolate, letting excess drip off, then place back on parchment. Immediately sprinkle finely shredded coconut over the truffle or gently press it into the wet chocolate for a Snowball look. For a two-tone finish, drizzle cooled white chocolate in a zigzag pattern. Tip: work in small batches and keep remaining chocolate warm by placing the bowl over a low heat source to prevent re-hardened chocolate.
Step 6: Set and serve
Allow dipped truffles to set at room temperature for 30 minutes or chill briefly (10–15 minutes) in the refrigerator for quicker firming. Store finished truffles in an airtight container layered with parchment to prevent sticking. Presentation idea: serve on a decorative tray dusted lightly with extra coconut and a few whole Snowball cookies for nostalgia.
Nutritional Information:
Estimated nutrition per truffle (assuming 24 truffles from recipe): Calories ~120–150, Total fat 7–9 g, Saturated fat 4–6 g, Carbohydrates 13–18 g, Sugar 10–14 g, Protein 1–2 g. These values are estimates — exact numbers vary with chocolate type, size of truffles, and ingredient substitutions. Data insight: swapping semi-sweet for dark chocolate reduces sugar content per serving and increases antioxidant polyphenols; using reduced-fat cream cheese will lower calories modestly but may affect texture.
Healthier Alternatives for the Recipe:
- Lower-sugar: Choose 70%+ dark chocolate and omit white chocolate drizzle; reduce coconut if using sweetened variety or switch to unsweetened shredded coconut.
- Lower-fat: Replace half the cream cheese with plain Greek yogurt (strained) or use low-fat cream cheese; note this can make centers slightly softer — chill longer before dipping.
- Dairy-free/vegan: Use vegan cream cheese, dairy-free chocolate chips, and coconut oil as a binder. Toast the coconut in a dry skillet for more depth without added sugar.
- Gluten-free adaptation: Verify that Little Debbie Snowballs are acceptable for your gluten sensitivity — since they aren’t gluten-free by default, consider using gluten-free marshmallow coconut cakes or a homemade gluten-free cake crumb substitute.
Creative twist: fold in 1/4 cup finely chopped toasted almonds or crushed graham crackers for a crunch contrast, mindful of allergen considerations.
Serving Suggestions:
Serve these truffles chilled or at cool room temperature on a holiday platter, dessert table, or as party favors in mini cupcake liners. Pair with robust coffee (espresso or French roast) to cut sweetness, or a creamy hot chocolate for maximum indulgence. For a brunch twist, top with a raspberry or a smear of fruit jam to add acidity and a pop of color. Personalized hosting tip: create a “build-your-own truffle” station — offer sprinkles, chopped nuts, toasted coconut, and drizzles so guests can customize their finishes.
Common Mistakes to Avoid:
- Using warm centers for dipping — causes chocolate to seize and smudge instead of coating cleanly. Always chill centers first.
- Over-processing crumbs to powder — leads to a dry, sandy texture that won’t form cohesive truffles. Keep some small clusters for moisture retention.
- Overheating chocolate — results in grainy, dull coating. Melt gently and avoid water contact.
- Skipping salt — a tiny pinch in the filling balances the intense sweetness.
- Rushing the set time — placing truffles into a humid fridge too soon can cause condensation and dull chocolate shine; allow to cool briefly before transferring.
Storing Tips for the Recipe:
Store truffles in an airtight container layered with parchment at cool room temperature for up to 48 hours or refrigerated for up to 7 days. For longer storage, freeze for up to 3 months: flash-freeze single-layered on a tray until firm, then transfer to freezer-safe containers with parchment between layers. Thaw in the refrigerator for 1–2 hours before serving to avoid condensation forming on the chocolate. Best practice: remove from fridge 10–15 minutes before serving so centers soften slightly for optimal texture.
Conclusion:
Little Debbie Snowball Truffles are a playful, efficient way to elevate a nostalgic snack into an elegant bite-size treat that’s customizable, crowd-pleasing, and approachable for home cooks. With minimal equipment and straightforward steps — plus flexible substitutions for dietary needs — these truffles make excellent holiday treats, party bites, or a simple indulgence. Try the recipe, tweak flavors to match your palate, and share photos or notes about your variations so others can learn from your tests.
FAQs:
Q: How many truffles does this recipe make? A: Yield depends on size, but a 1-inch scoop typically yields 20–24 truffles from a standard 12-Snowball box and the binder quantities listed.
Q: Can I use store-bought marshmallows instead of Snowballs? A: You can, but texture and flavor will differ; Snowballs provide cake, marshmallow, and coconut in one. For a closer replica, crumble a chocolate cake roll or cupcakes with marshmallow filling.
Q: Do I need a candy thermometer? A: Not necessary for this recipe, but a thermometer helps avoid overheating chocolate and improves results for less experienced bakers.
Q: How do I prevent chocolate from streaking when drizzling white chocolate? A: Ensure white chocolate is fully melted and slightly cooled; use a squeeze bottle or piping bag for controlled lines, and work quickly before the darker coating fully sets.
Q: Are these safe to make ahead for events? A: Yes — refrigerate up to a week or freeze up to 3 months. Bring to refrigerator temperature before serving for best flavor and texture.
If you’d like, I can convert this into printable recipe card format, create a grocery list, or suggest a gluten-free version using homemade substitutes.
Little Debbie Snowball Truffles
Decadent, no‑bake truffles made from Little Debbie Snowball cakes — creamy, coconutty, and perfect for gifting.
Ingredients
- 12 Little Debbie Snowballs (about 10–12 oz / 300–340 g total)
- 8 oz (225 g) cream cheese, softened
- 1/2 cup (60 g) powdered sugar, sifted (optional, adjust to taste)
- 1 teaspoon vanilla extract
- Pinch of salt
- 1 cup (80 g) shredded sweetened coconut, plus extra for rolling
- 12 oz (340 g) white chocolate chips or candy melts
- 1 tablespoon coconut oil or neutral oil (optional, to thin chocolate)
Instructions
- Place the Little Debbie Snowballs in a food processor and pulse until fine crumbs form. Alternatively, place them in a sealed bag and crush with a rolling pin.
- Transfer the crumbs to a mixing bowl. Add the softened cream cheese, powdered sugar (if using), vanilla extract, and a pinch of salt. Mix until a smooth, sticky dough forms. Stir in 1 cup shredded coconut until evenly distributed.
- Using a small cookie scoop or a teaspoon, portion the mixture and roll into 1‑inch balls with your hands. Place the formed truffles on a parchment‑lined baking sheet. Chill in the refrigerator for 30–60 minutes until firm.
- While the truffles chill, melt the white chocolate chips or candy melts in a microwave‑safe bowl in 20–30 second intervals, stirring between each, until smooth. If needed, stir in 1 tablespoon coconut oil to thin the chocolate to a dip‑friendly consistency. Alternatively, use a double boiler.
- Dip each chilled truffle into the melted white chocolate, using a fork to lift and tapping off excess chocolate. Place the coated truffle back on the parchment. Immediately sprinkle or press a little extra shredded coconut on top to finish.
- Repeat until all truffles are coated. Chill the truffles again for 20–30 minutes to set the coating.
- Store truffles in an airtight container in the refrigerator for up to 5 days or freeze for up to 1 month. Let thaw briefly before serving.
Nutrition Information
- Calories: 160 kcal
- Cholesterol: 25 mg
- Sodium: 70 mg
- Carbohydrates: 17 g
- Fiber: 0.5 g
- Sugar: 12 g
- Protein: 1.6 g